Host a static website on Amazon S3 in 5 minutes
Amazon S3 can be used to host a static website. For hosting dynamic websites, other AWS services can be used.
To configure an S3 bucket for static website hosting, the AWS Management Console (the web UI) can be used, without the need to write any code. To do so, you first need to configure the bucket and then upload your website content.
Create a new bucket with public access
To create a new bucket, open the AWS Management Console and go to the S3 service. On the left-hand side choose a section named Buckets. Once in the section, click on the Create bucket button. Give your new bucket a name. This name has to be unique across the whole global AWS infrastructure. Choose the bucket region. It should be the closest region to where you are located. Click on Next.
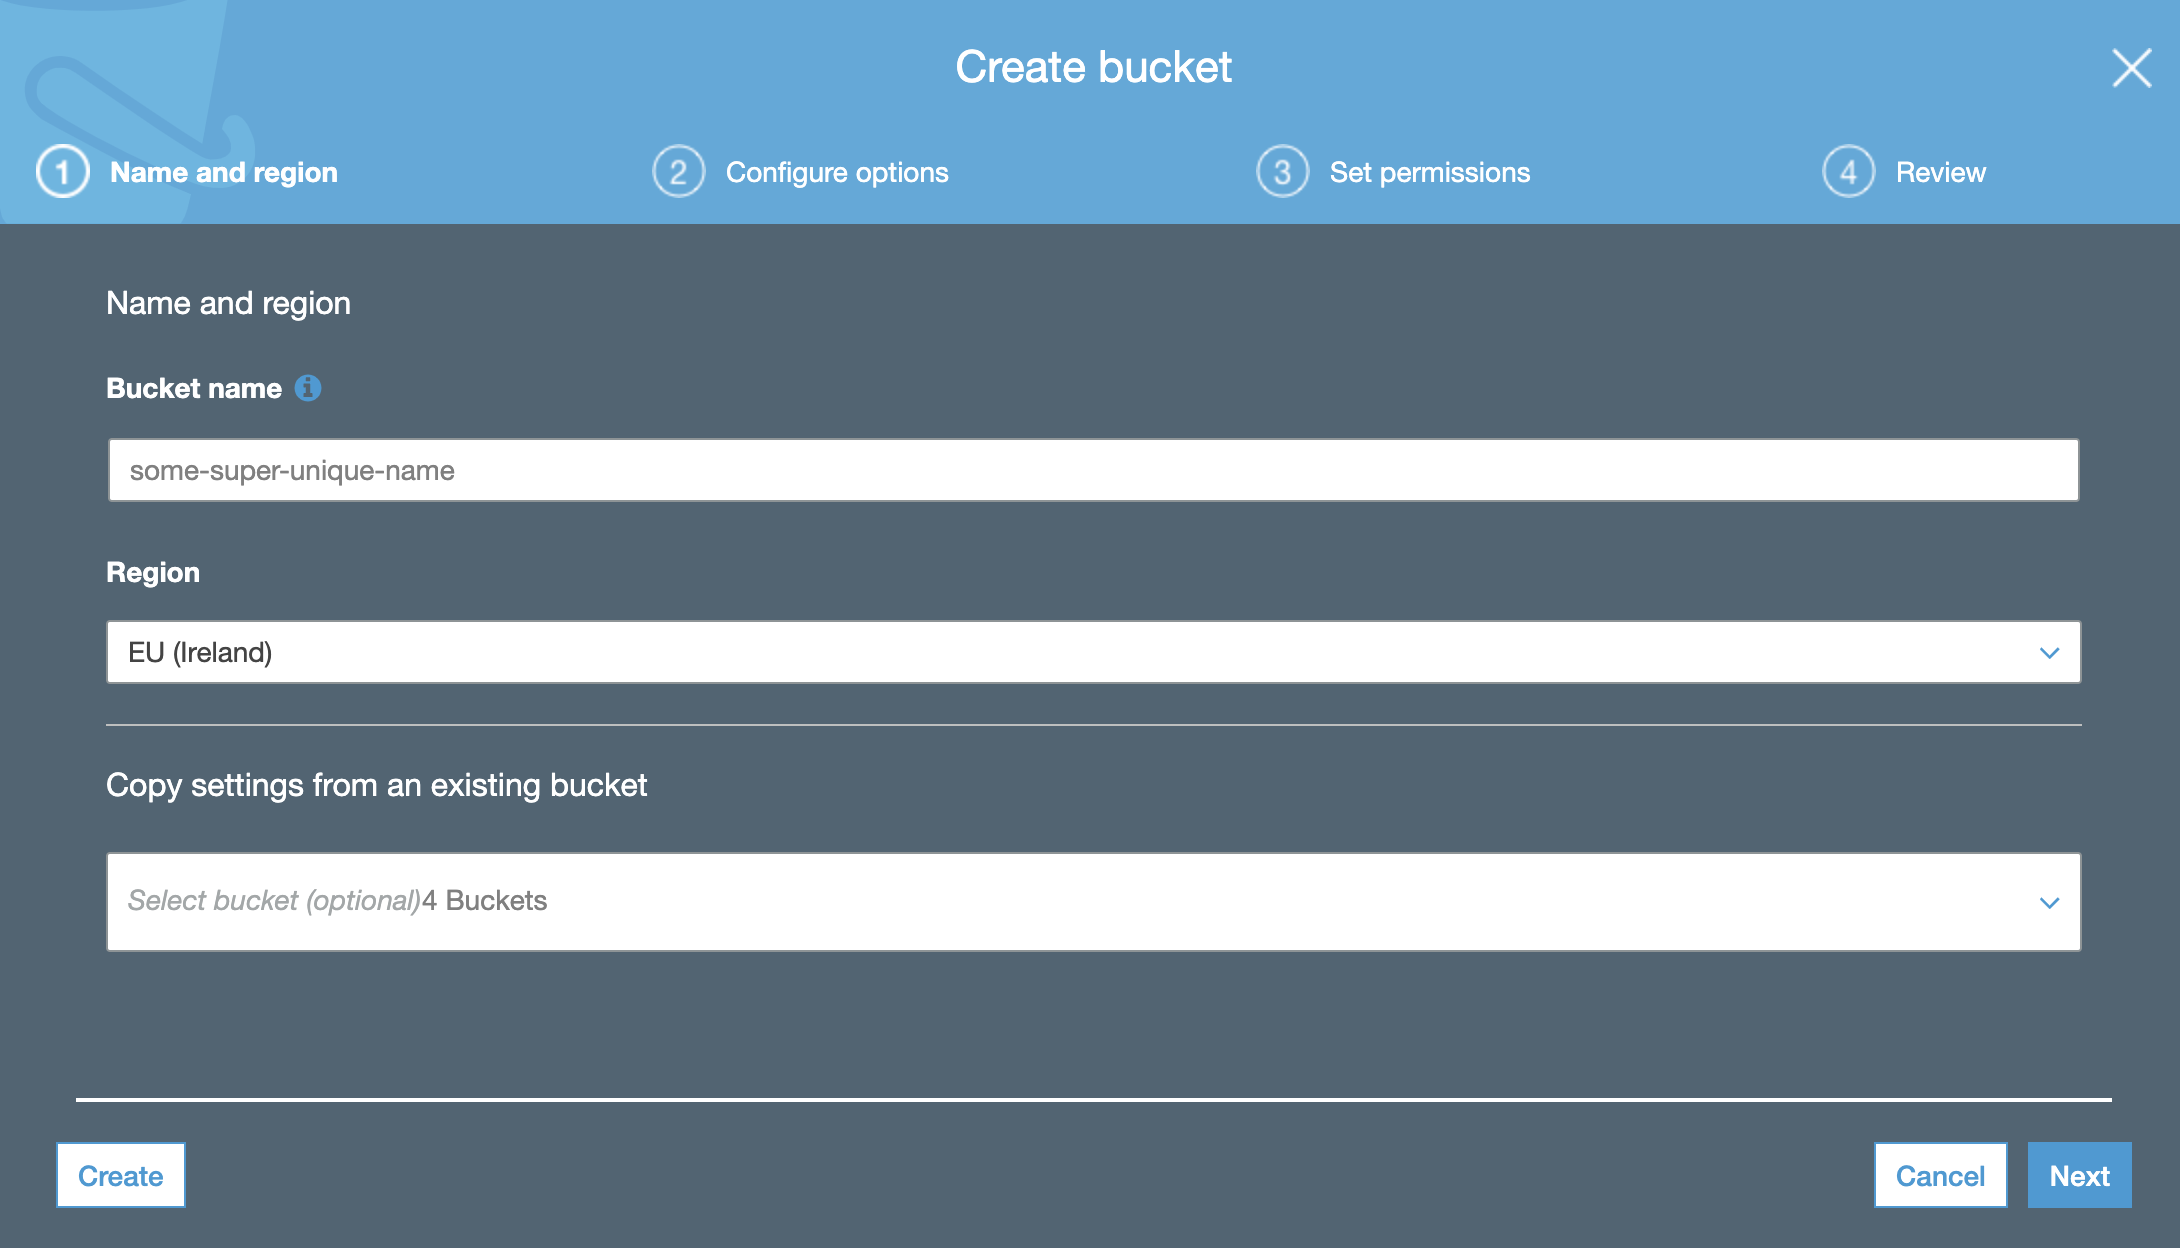
You do not need any additional settings in the Configure options tab, so click on Next. In the Set permissions tab, you have the option of blocking all public access enabled by default. In order for your website to be accessible from the Internet, you need to allow that access. Untick the option.
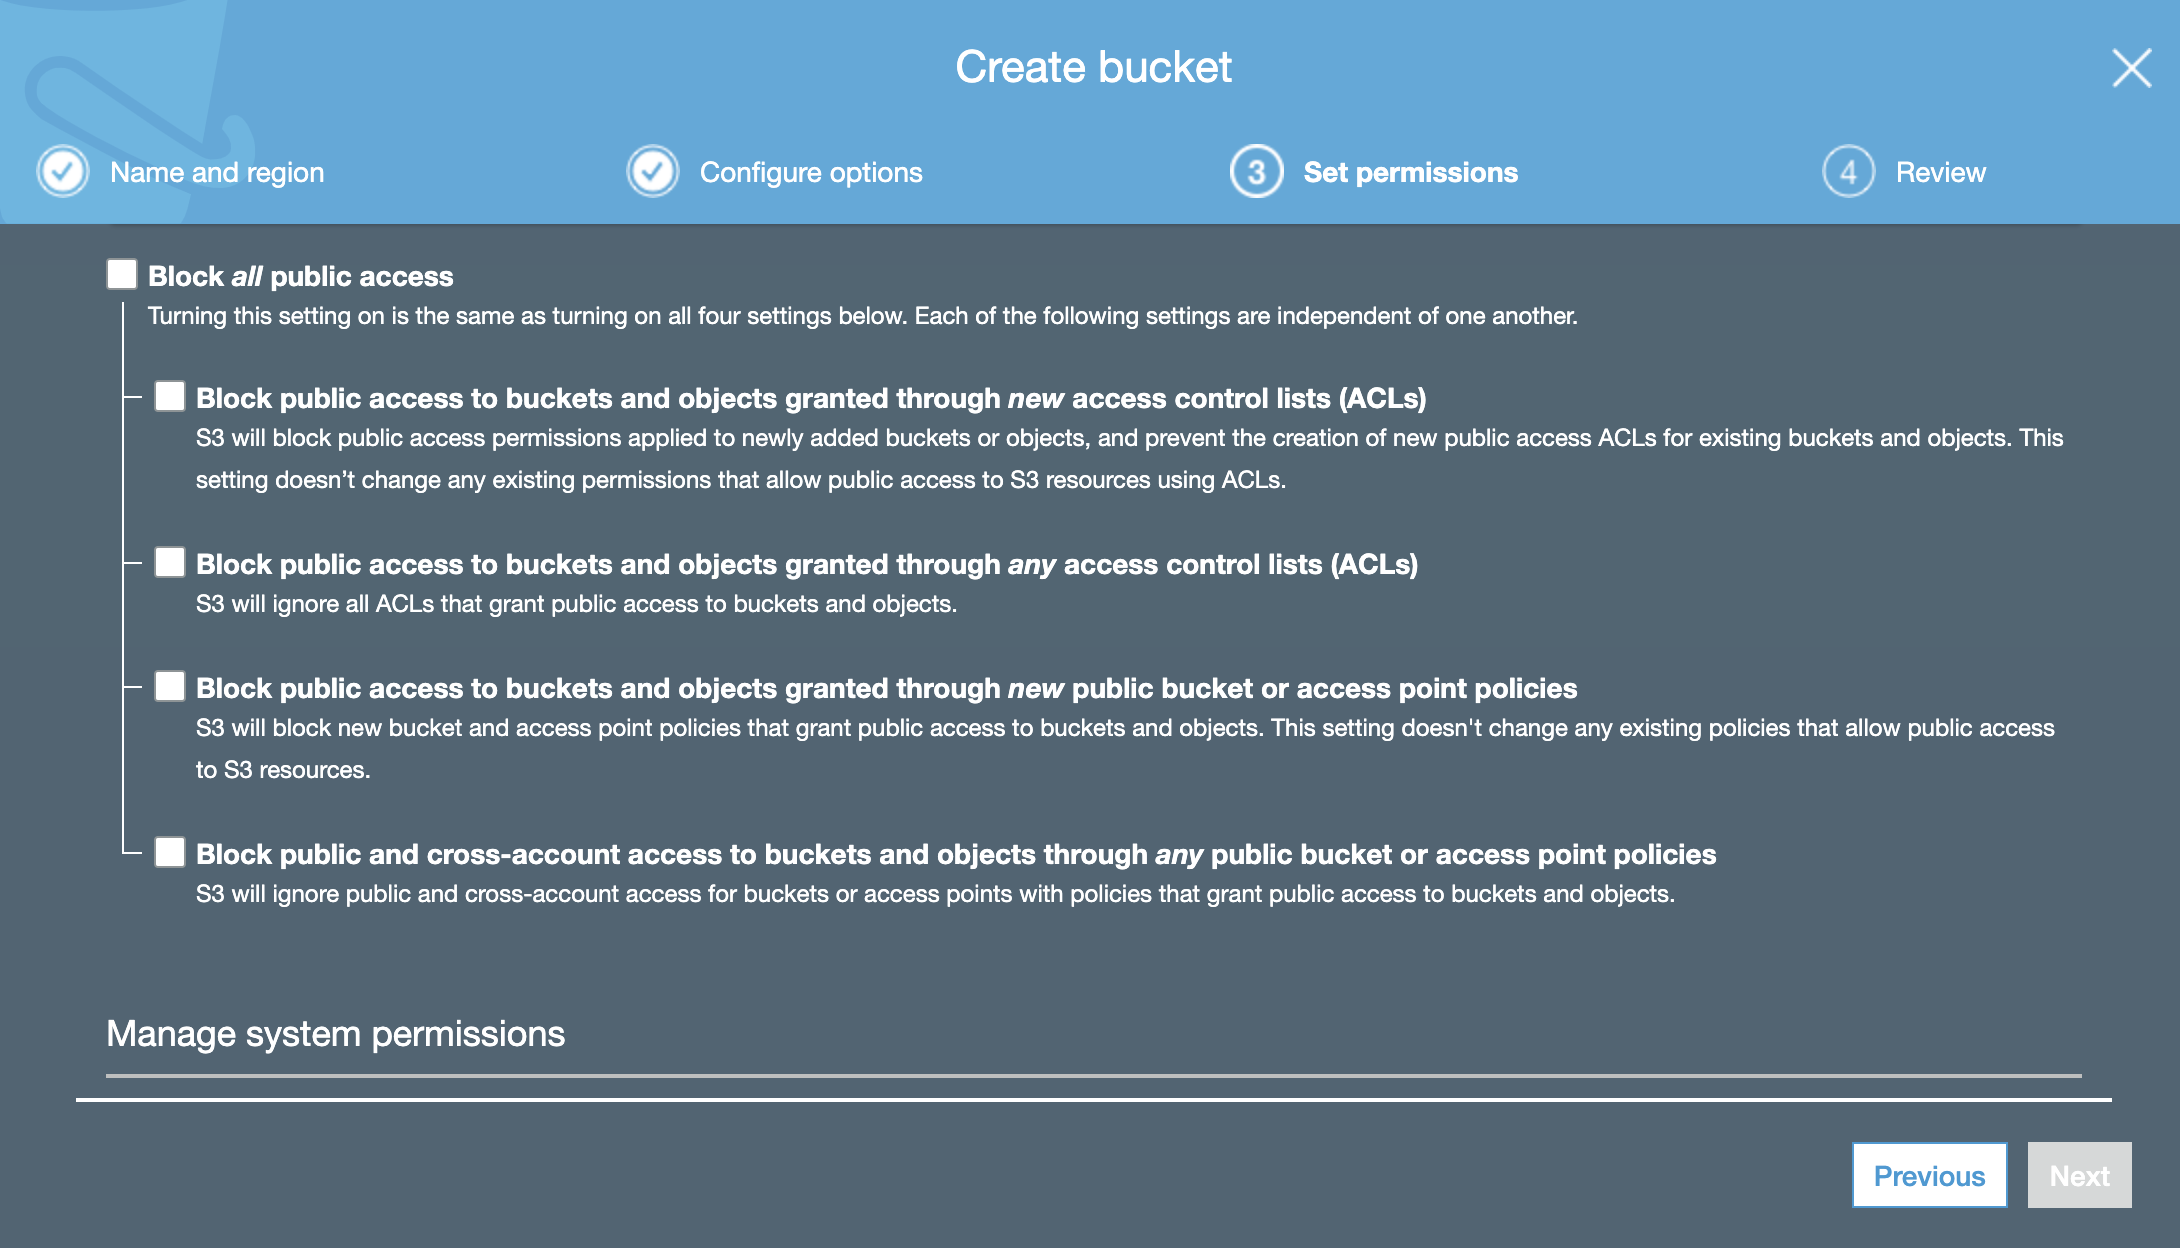
You will see a warning, but as you can see it strictly relates to this use case:
AWS recommends that you block all public access to your bucket unless public access is required for specific and verified use cases such as static website hosting.
To proceed, you have to tick the acknowledgment box.

Click on Next and Create bucket.
Create a policy for the bucket
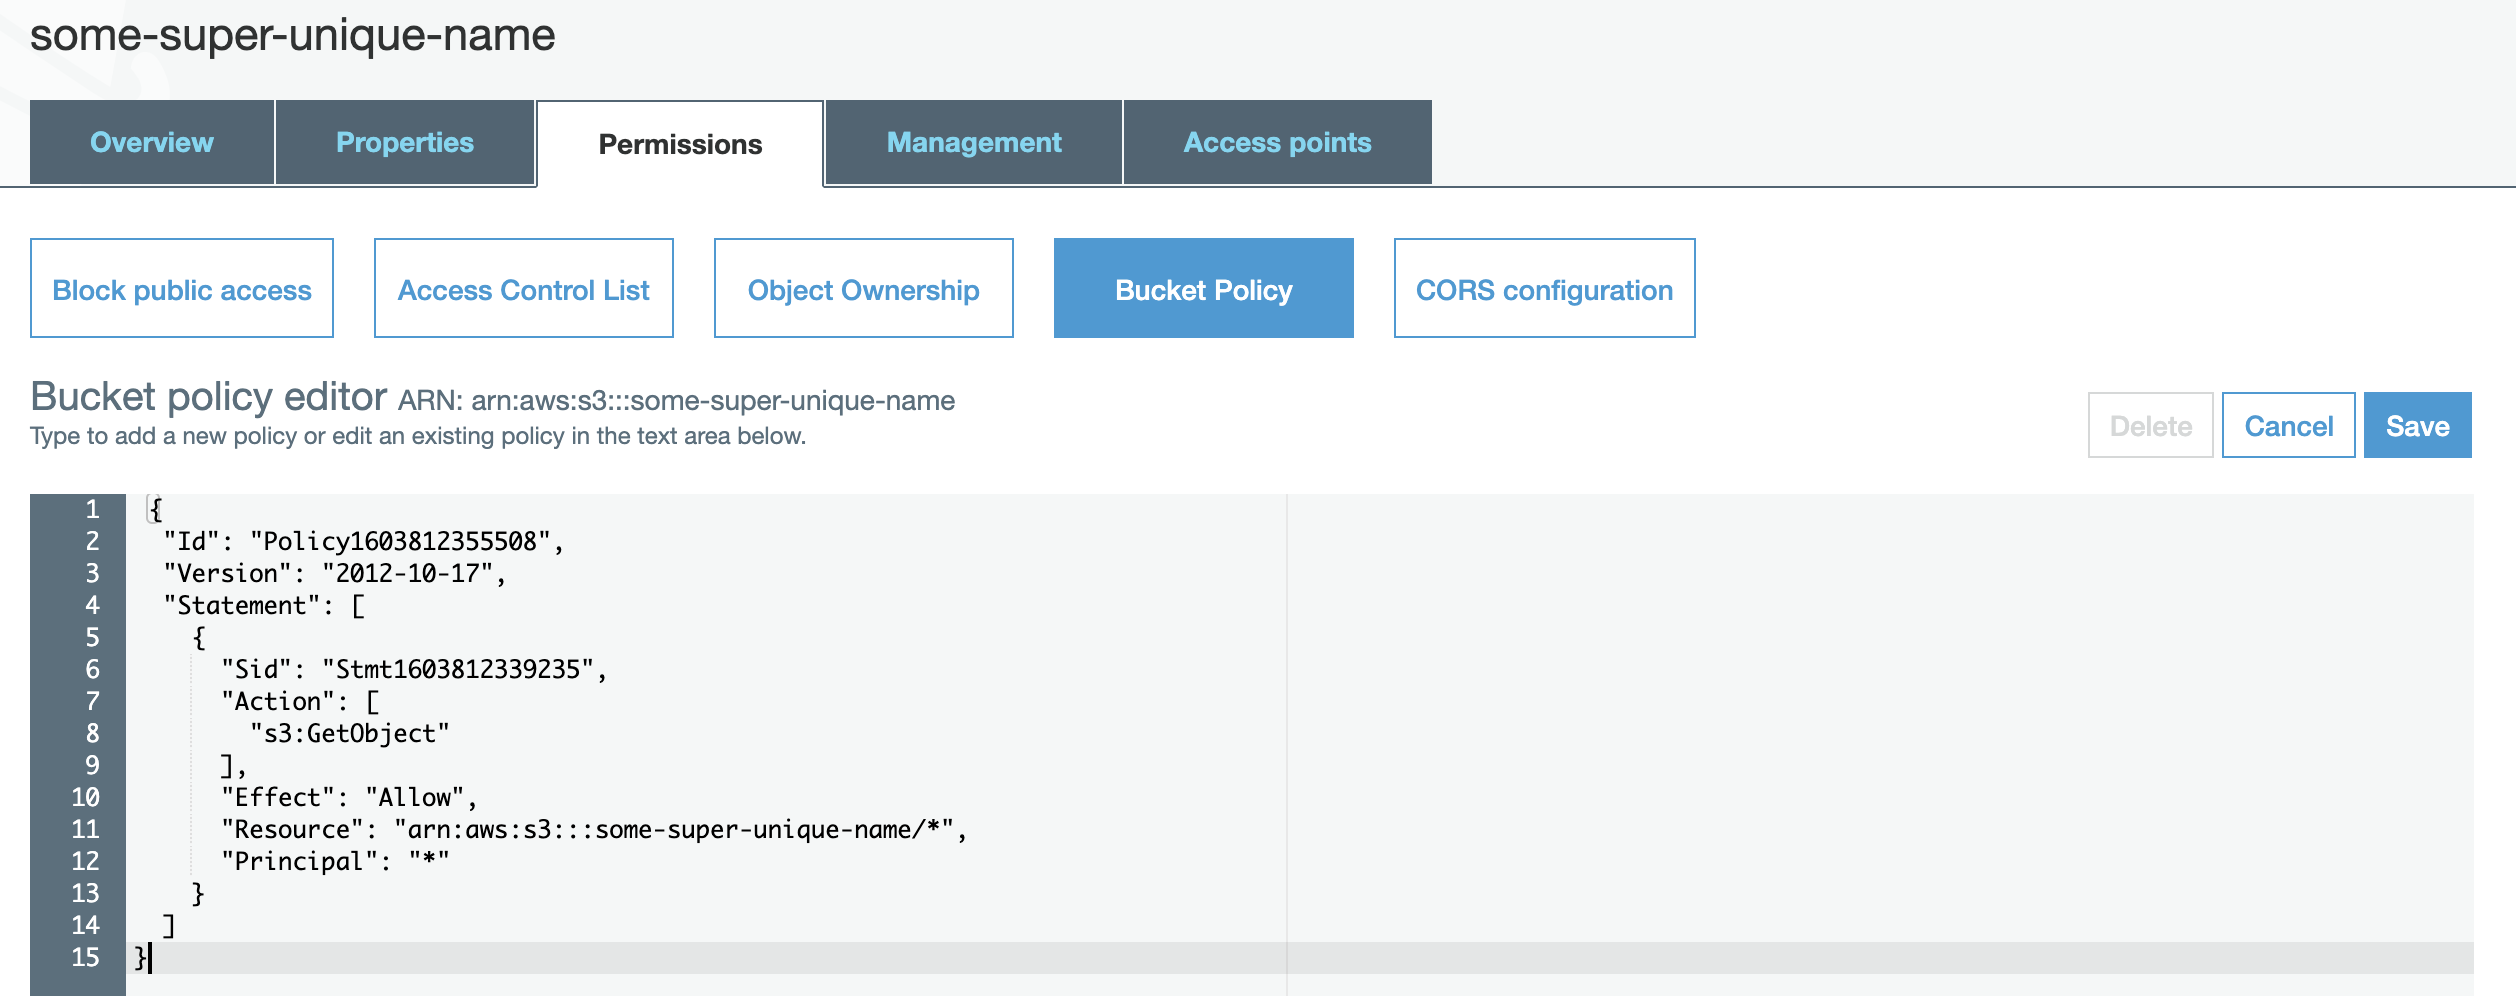
You have to create a bucket policy so that anyone has read access to all objects inside it. The easiest way is to go inside the bucket, open Permissions, then Bucket Policy and at the bottom of the page there is a link to a policy generator. Open it in a separate tab. On this page, you will also find the ARN (Amazon Resource Number) of your S3 bucket. Copy it as you will need it in a moment.

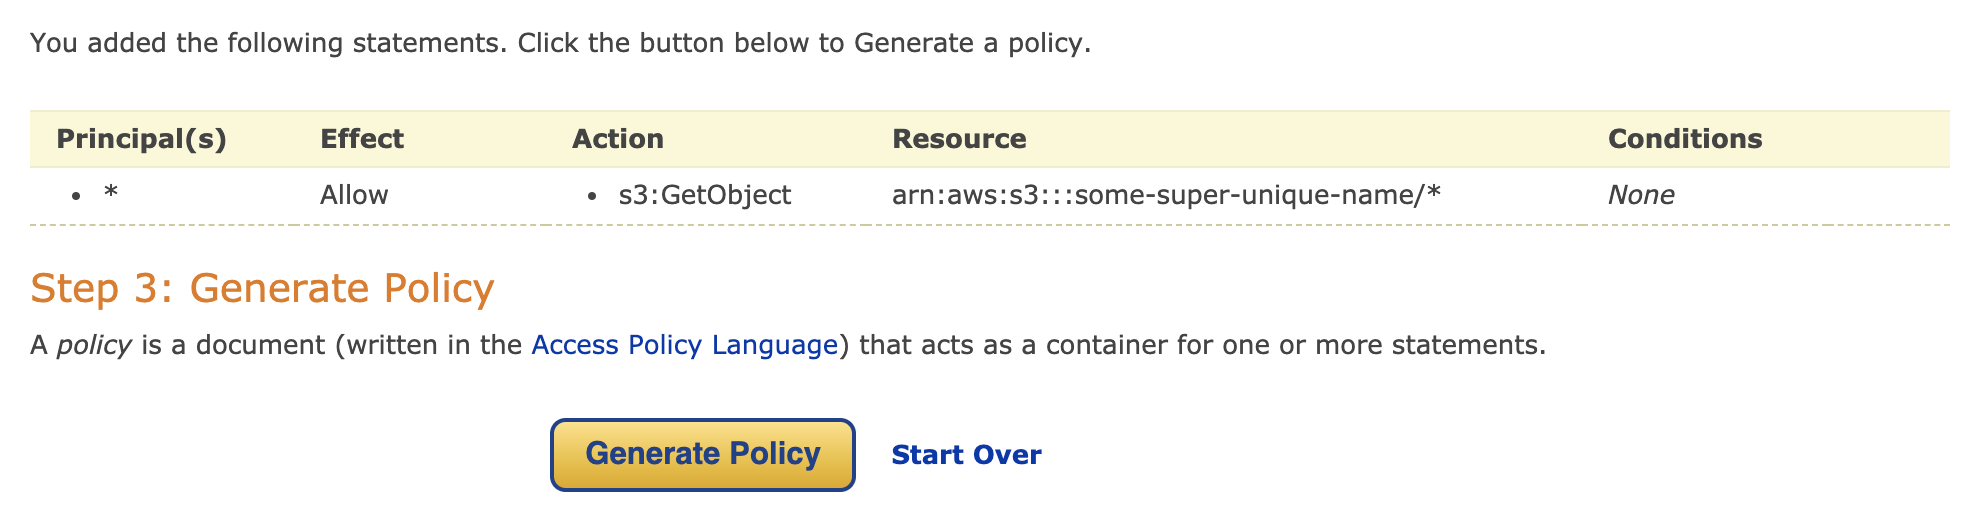
The settings in the policy generator should be as follows:
Select Type of Policy: S3 Bucket Policy
Effect: Allow
Principal: * (all objects in the bucket)
AWS Service: Amazon S3
Action: GetObject (anyone will have read access to anything that is inside the bucket, which is exactly what you want for a publicly accessible website)
Amazon Resource Name: paste the ARN you previously copied and add the slash and wildcard at the end, in my case it is arn:aws:s3:::some-super-unique-name/*
Click on Add Statement and Generate Policy. The policy JSON document is generated. Copy it and paste it back into the Bucket policy editor. Click on Save.
Upload a website to the S3 bucket
Now it is time to upload your files to the bucket. You can download an HTML5 template for free from multiple sources on the Internet.
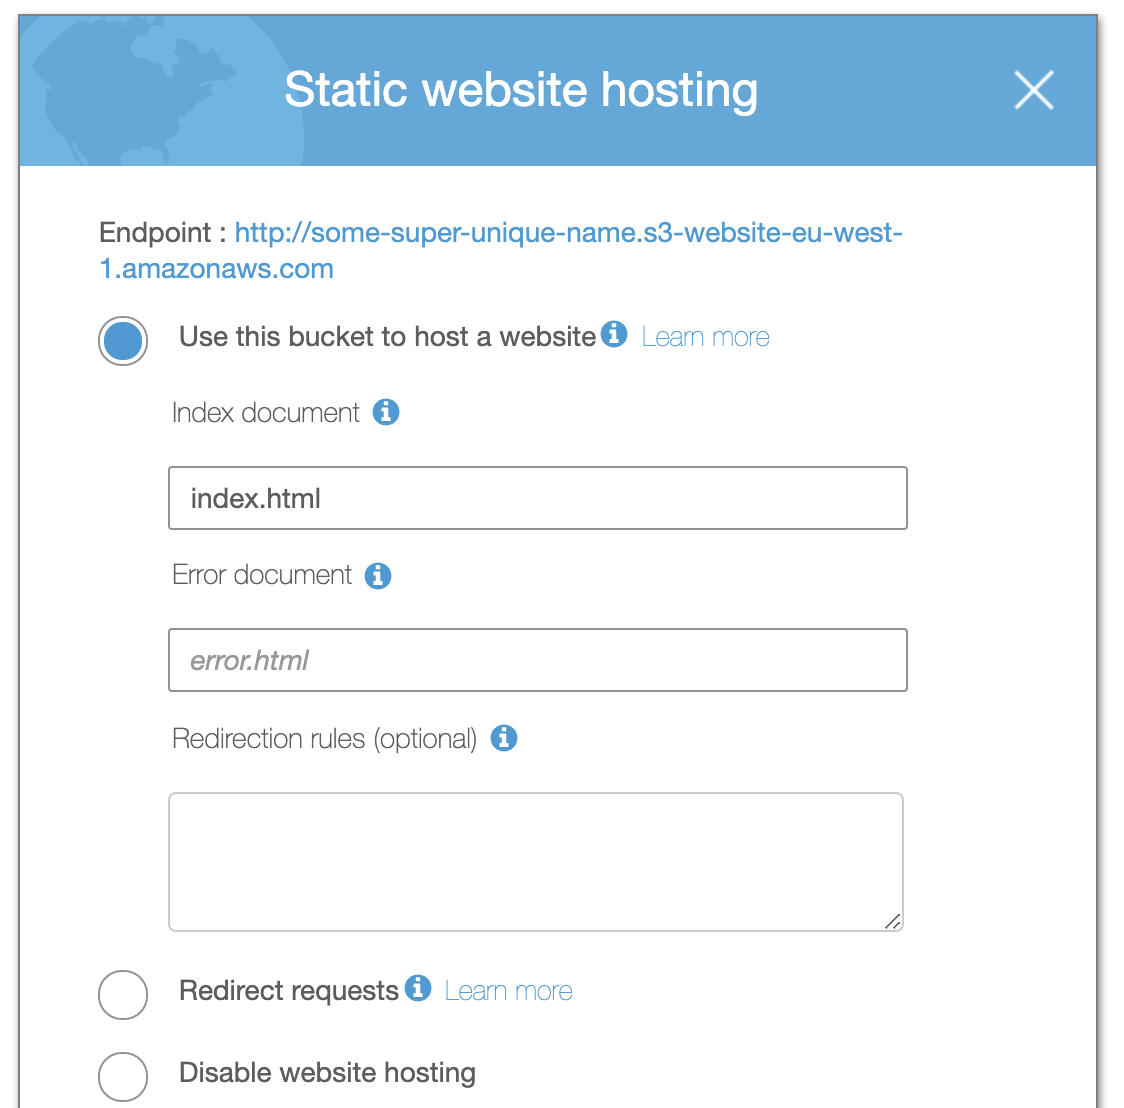
Enable S3 website hosting
The last step is to allow the S3 bucket to actually respond to requests from a browser. Go to Properties tab, then Static website hosting and click on the option Use this bucket to host a website. You need to provide an index document, which in general is stored in the index.html file (check your HTML template for that). Click on Save.
When you click on the Static website hosting option again, you will see your website endpoint at the top.
Congratulations!
Your website is ready :)