Create a static website using Jekyll and Docker
This tutorial shows how to set up a Docker container with Ruby and Jekyll and create a static website (just like this one). We’ll use Visual Studio Code (VSC) to write code and interact with containers. You will also see how to host the website for free using GitHub Pages.
Jekyll is a static site generator written in Ruby. It is designed to make it easy to create static websites, which are websites that do not use a database and are built from a set of static files. Jekyll takes a set of plain text files written in Markdown and converts them into a static website. The resulting website can be served from any web server and does not require any special software or servers.
GitHub Pages is a static site hosting service that takes HTML, CSS, and JavaScript files straight from a repository on GitHub, optionally runs the files through a build process and publishes a website. It can be used to host a personal site, a project site, or a site for your organization.
Prerequisites
To follow this tutorial, you must have Docker Desktop and Visual Studio Code (VSC) installed on your computer. If you don’t, see some tutorials on the Internet on how to do this (it’s pretty straightforward and quick). Also, create a GitHub account if you don’t have one.
Add below extensions to your VSC:
- Docker – the official version from Microsoft

- Dev Containers – the official version from Microsoft

After installing the extensions, quit and relaunch the VSC if needed.
Set up GitHub Pages
To host your website for free using GitHub Pages, you have to create a new public repository. Log in to your GitHub account and click on + > New Repository in the top right corner.

I recommend initializing the repository with a README file and a .gitignore file from the Jekyll template.
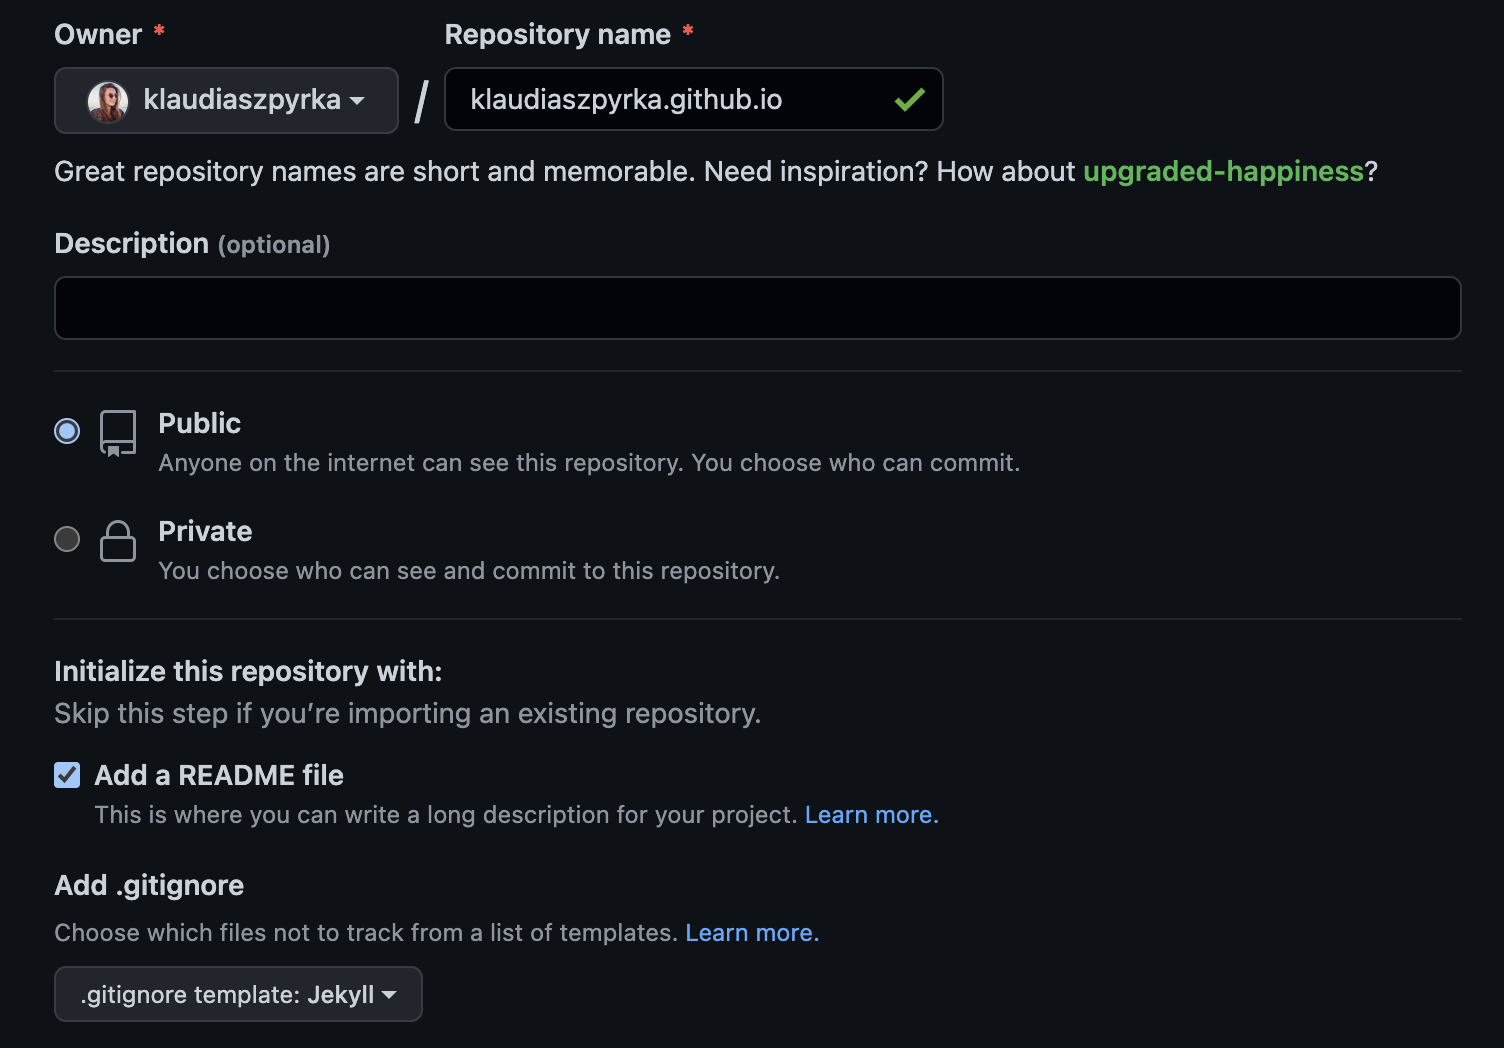
Leave all other options at their default and click on Create repository.
Go to the repository Settings and the Pages tab. Choose the main branch as the source and click on Save.
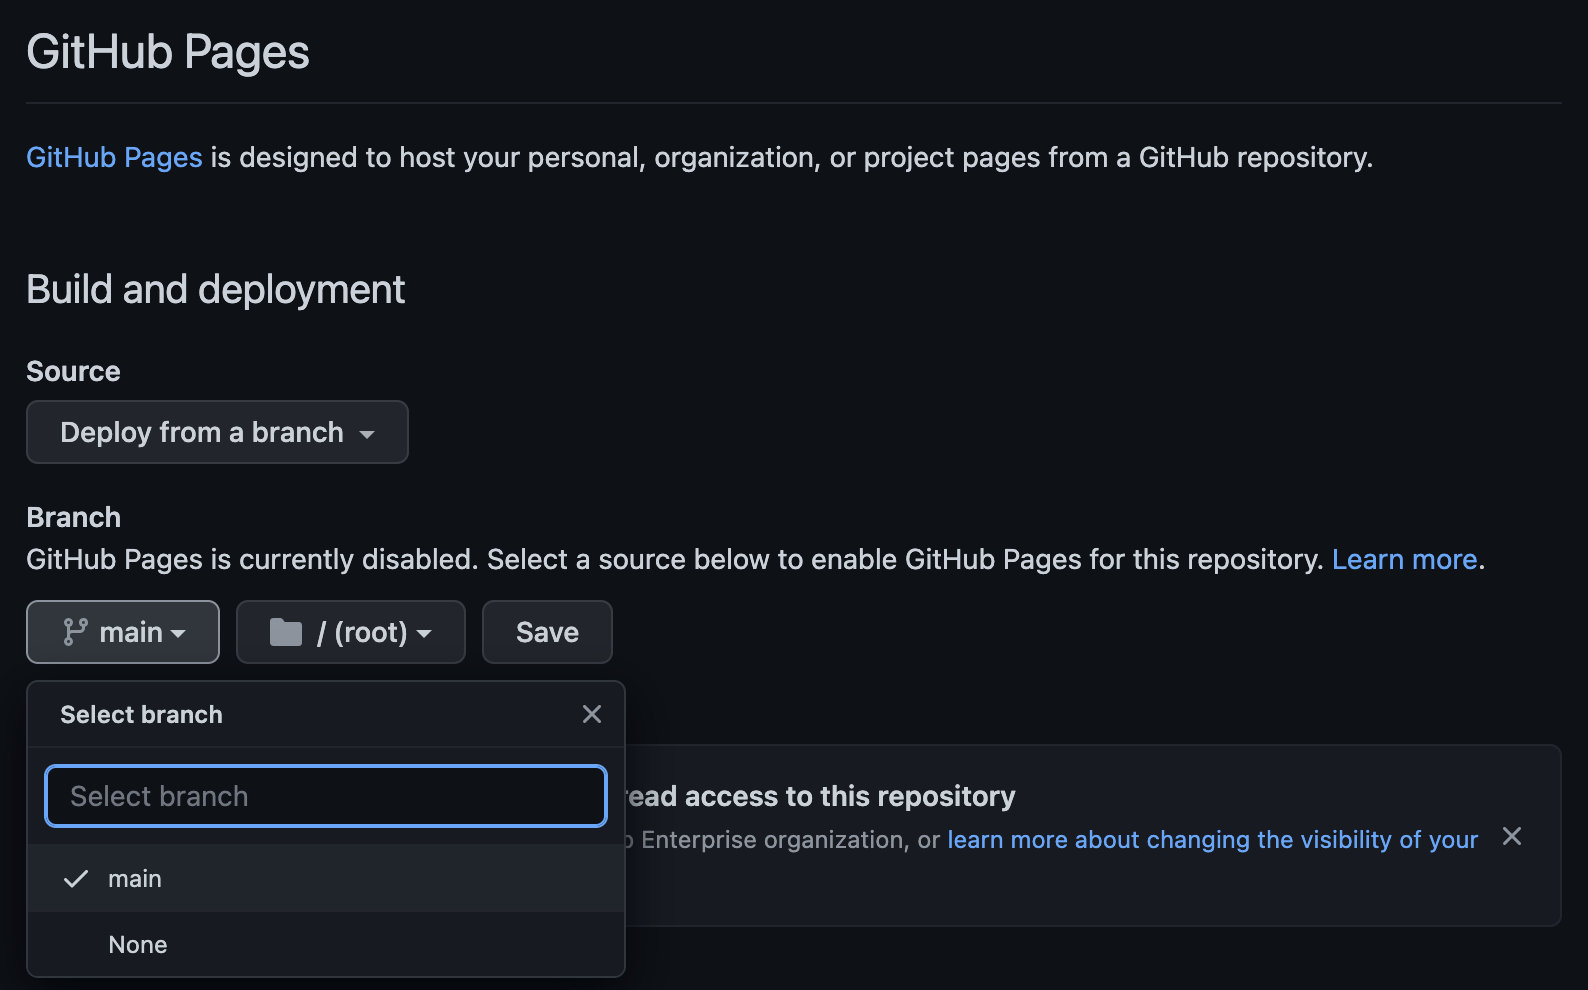
After a couple of minutes the website should be ready. You can check in the Pages tab for a Your site is live at… infobox or on the main page of your repository – look for a green checkmark on the commits tab.

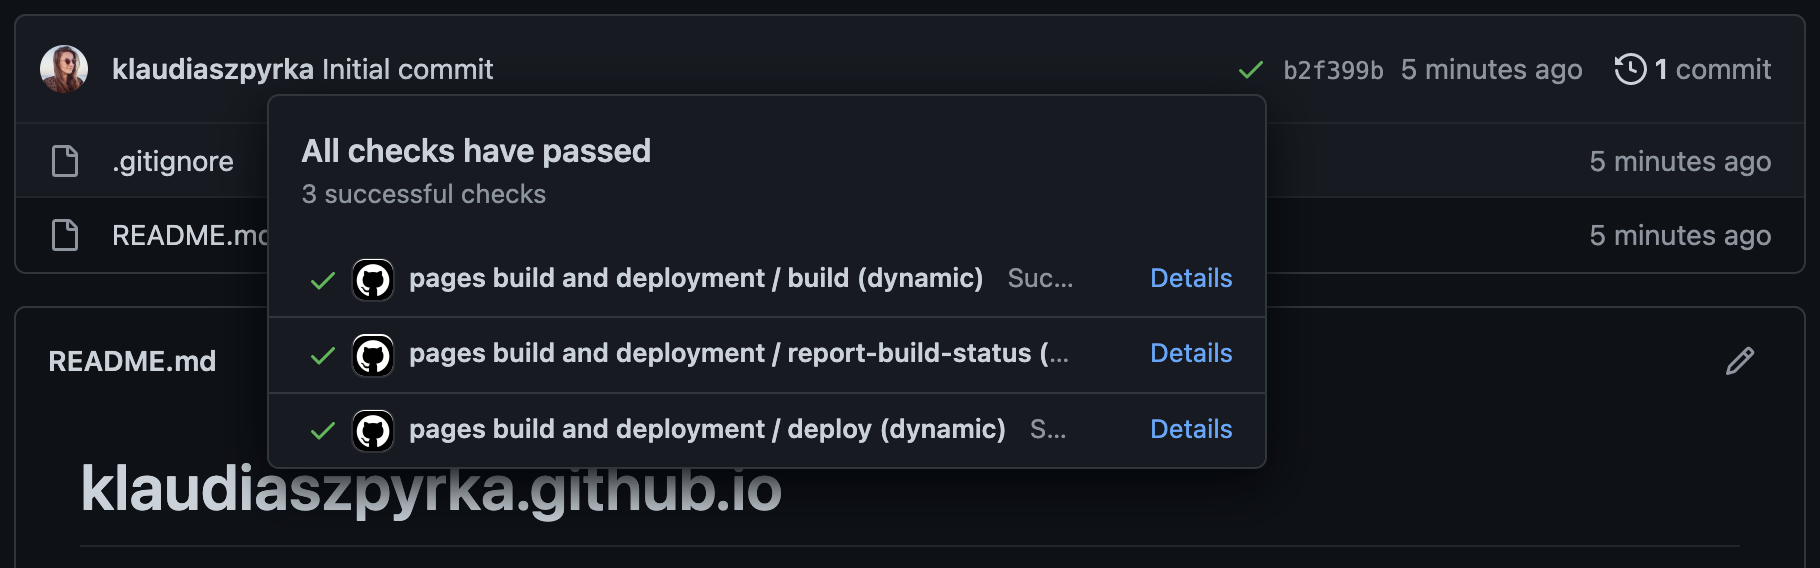
At the moment, the website shows only the contents of the README file. Let’s make it more interesting.
Clone the repository
First, you need to clone the repository to the local machine. There are multiple ways to do this. My preference is using GitHub Desktop. Search the Internet if you don’t know how to clone a GitHub repository, then come back to this tutorial.
Create a Docker image and start a container
We’ll create a Docker image with Ruby and Jekyll using Dockerfile. Find the folder with the GitHub repository you cloned and create a file named Dockerfile inside with the following contents.
1
2
3
4
FROM ruby:3.0-alpine3.16

RUN apk update
RUN apk add --no-cache build-base gcc cmake git ruby-jekyll
The base image is Ruby version 3.0. I found some issues with Jekyll installation in the newer versions. Note, though, that as per Jekyll docs Jekyll requires Ruby version 2.5.0 at a minimum so you cannot go lower than that. I chose the Alpine version, which is a lightweight Linux distribution.
After pulling the base image, we run a couple of commands. First, there is apk (Alpine Package Keeper) update. Then we install a couple of Jekyll dependencies. See the list of required packages and their versions at Jekyll docs.
Once you create the Dockerfile, go to the VSC, press SHIFT + CMD + P or View > Command Palette... and search for Dev Containers: Open Folder in Container command.

Find the cloned repository and click Open.

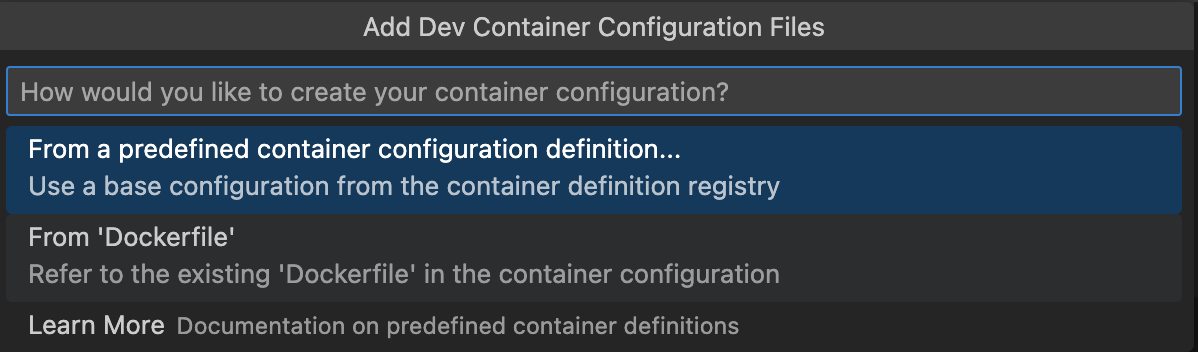
You will be asked to choose Container Configuration Files. Select the second option: From 'Dockerfile'.
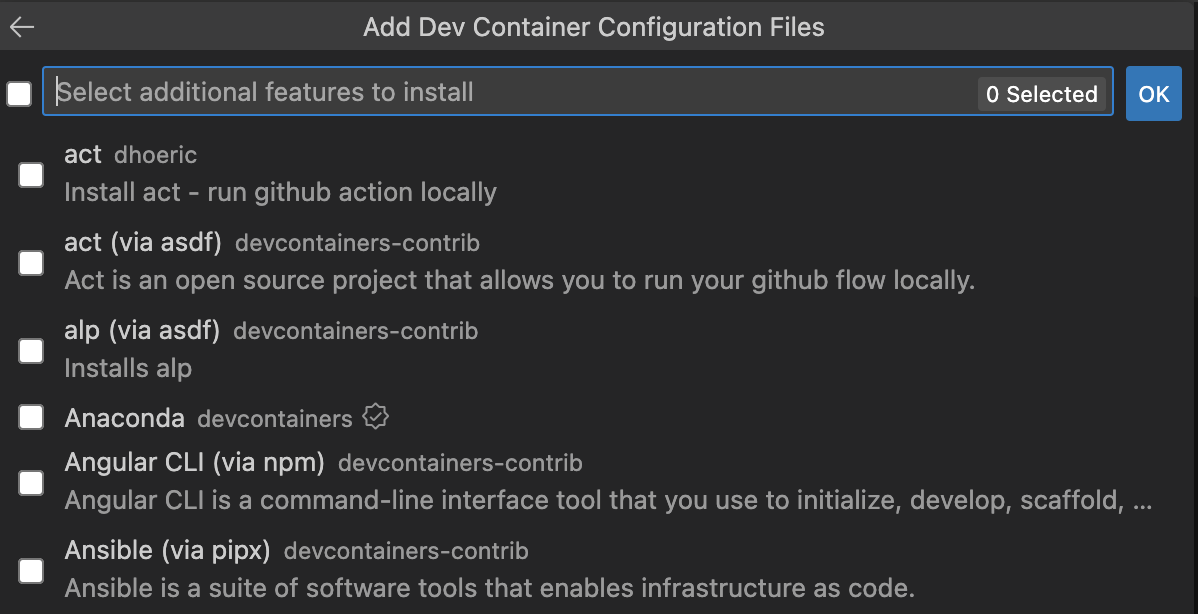
You don’t need additional features, so click OK.
A box will pop up with information that the container is being created. You can click on it to see the log and track which commands are currently being executed. It might take a couple of minutes to spin up the container.

Create and configure the Jekyll website
Once the container is up and running, open the VSC command palette (SHIFT + CMD + P or View > Command Palette...) and select Terminal: Create New Terminal.

A new terminal tab should pop up at the bottom, and you will see that you are inside the newly created container. Any commands that we issue from now on are going to be executed inside this container.

We will now run a bunch of commands to install Jekyll and initialize a minimal website. Since we want to host this webpage with GitHub Pages, let’s check its dependencies and see the required Jekyll version.

Execute the following commands in the container terminal:
1
2
3
4
5
6
7
bundle init
bundle add jekyll --version "~>3.9.0"
bundle exec jekyll new --force --skip-bundle .
bundle add webrick
bundle install
bundle update
bundle exec jekyll serve
bundle init – generate a Gemfile. Gemfile is a Ruby file that defines dependencies.
bundle add jekyll --version "~>3.9.0" – add the Jekyll gem to the Gemfile and install it.
After this step, you can either check for the following line in the Gemfile: gem "jekyll", "~> 3.9.0" or run gem list jekyll to confirm that it has been installed.
bundle exec jekyll new --force --skip-bundle . – set up a minimal Jekyll site. You will see a bunch of files appear in your working directory.
bundle add webrick – add the WEBrick library to the list of dependencies. It provides a simple HTTP server implementation that can be used to host web applications.
bundle install – install the dependencies specified in the Gemfile.
bundle update – update the gems specified in the Gemfile to the latest available version (ensure that the project uses the most up-to-date versions of the gems it depends on).
bundle exec jekyll serve – build and serve the Jekyll website. The jekyll serve part of the command tells Jekyll to build the static website and start a local server to serve the website. Jekyll will build the website using the files in the current directory.
Now, your website is ready and you can view it in the browser at http://127.0.0.1:4000/ or http://localhost:4000/ or using the VSC pop-up message.

Next, go to your GitHub repository in the browser, copy the URL of your website and go back to the VSC. Open the _config.yml file and paste the following information:

Note that my website doesn’t have a subpath, but if yours does, you will also have to provide this information (paste everything that comes after the slash, including the slash itself) in the baseurl section.
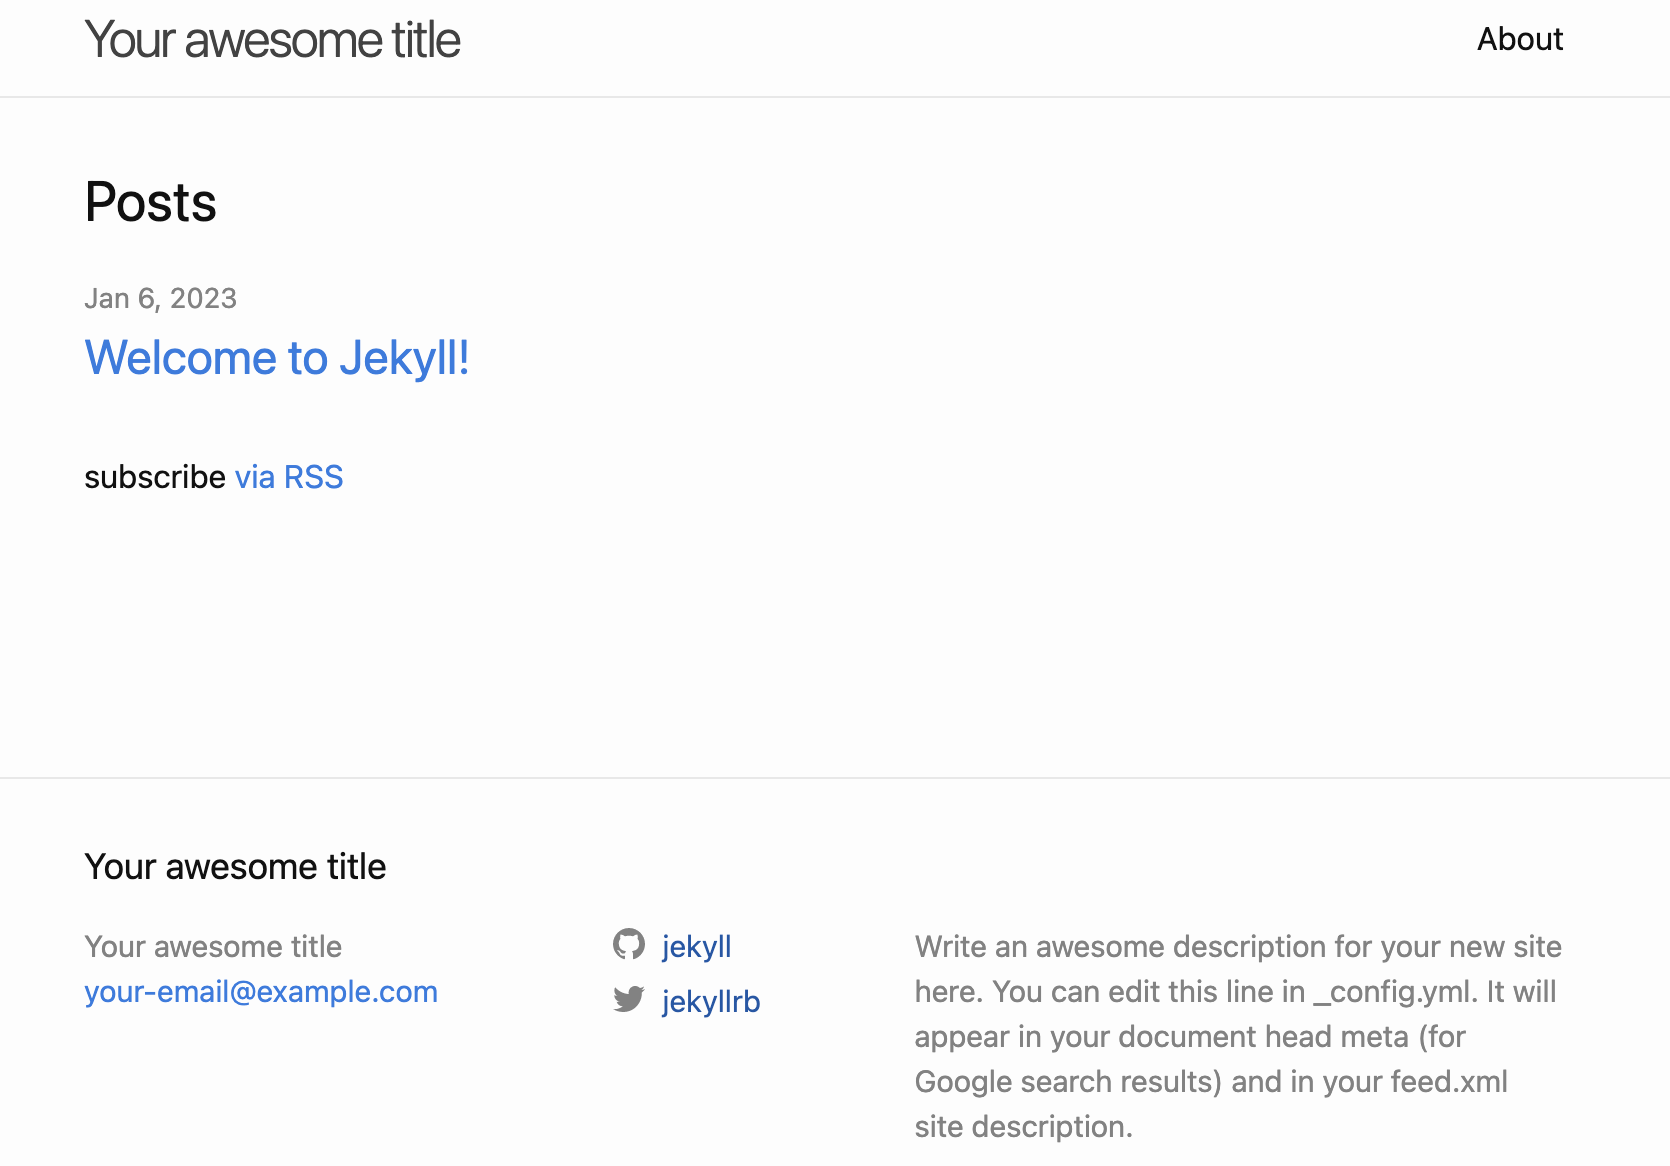
Save the file and push changes to GitHub. Wait for the green checkmark in the main repository view and open your website once it’s ready. You should see now that it no longer consists of the README file but the Minima template.
Working with Docker containers
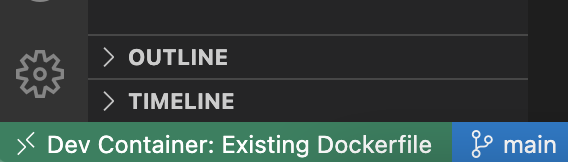
The green box at the bottom left corner of VSC indicates that you are connected to a Docker container.
Once you’re done with building and modifying your website, use the VSC command palette and search for Remote: Close Remote Connection. The container will get closed down.

Use the Dev Containers: Open Folder in Container command (as described earlier) to start the container again.
If, for some reason, you delete the container, you can start a new one by executing the same command (Dev Containers: Open Folder in Container) and then run the following commands inside:
1
2
3
bundle install
bundle update
bundle exec jekyll serve
Previously, when we started the container for the first time, we ran the bundle init command and added a bunch of packages, but all that exists now in the Gemfile. That’s why it’s enough to run the 3 commands above to get everything back up and running.
Enjoy your blog!
Visit https://jekyllrb.com/docs/ and check how you can modify and develop your website.